Search This Blog

Showing posts with label Chesil electrics. Show all posts

Tuesday, 26 May 2020

Update May 26th 2020

Hazard switch update

One of the things I wanted to do was swop out the supplied hazard switch for a rocker switch to match the rest of the switches used in the car.


Supplied switch and intended for use rocker switch

The only way this works is to consider the Hazard Switch as selecting either "...turn signals on via the turn signal switch when ignition is on..." or "...both left and right turn signals flashing; ignition on or off."

To accomplish this, the wiring harness needed to employ two flasher units, one for the regular turn signals (supplied with Chesil harness) and an additional flasher unit for the hazard system.

The additional hazards system flasher has +12V power at all times. When the hazard switch is ON, power comes to the switch from the flasher and goes to both the left and right turn signal circuits. Lights blink at all four corners of the car.

It took me ages to figure this out, I have the wiring diagram if anyone is planning to do this.

Ancillary circuits

Heated Seats

I extended the harness provided with the heating element to allow me to fit the two control switches into the lower dash, (see photo of the lower dash later in this update). The power was provided via relays situated in the rear of the car,


Audio

The main feed for the audio amp is in place

Additional switched fuse board

I have added another fuse board into the car. Rather than extend from the fuse board on the loom and trust that the wiring capacity was ok, I decided to run a new live fused feed from the battery then used a relay to switch on the fuse board.

The new fuse board was better than the one on the loom, so much so that I chopped out the original and replaced it with a new unit to match the additional board.
Original fuse board


New fuse board using central bus bar


Nearly finished wiring in the front.

Future electric heater

There is a chance that in the future I'm going to add an electric heater to the car. I have therefore made provision both in choice of battery and by using a 90 amp alternator ( I upgraded the loom to handle the more powerful alternator and added an inline fuse from the alternator for extra protection). It seemed worth adding the necessary circuits into the car now, so in the future I just have to connect the heater. It does of course pull a fair amount of power so I have used high power relays with suitable wire with an inline fuse on the circuit. I have left out the inline fuse so its not live.

Immobiliser

I have made a bracket to install the immobiliser key fob unit, and mounted it alongside the rocker switches. (see picture below)

Electrical harness tidy and clip

Now that all the circuits are in and tested, I have gone through most of the wiring, adding sleeve and clipping securely into place. The lower dash panel which is used for thel rocker switches has been finished using a carbon fibre shrink vinyl.


Original lower dash with some switches in place

Completed lower dash with carbon fibre covering (just needs the immobiliser sensor)

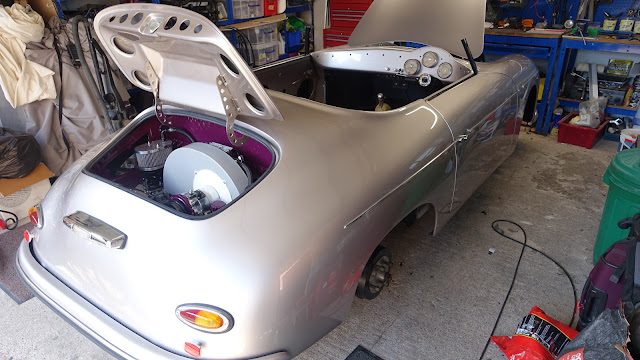
Car overview


Next jobs

  • Finalise clipping in all the wiring
  • Final fit on main switches and instruments
  • Final fit on steering column


Wednesday, 22 April 2020

Update April 22nd 2020

A holiday took up the first 3 weeks of the March, then had lots of other stuff to do so I decided to skip the normal end of month report for March and jump to April.

It's all about the electrics, I am much happier with spanners!!! Anyway I am making good steady progress and I have listed some of the work I have been doing. Its a good project when we are all locked up due to the Covid virus.

One thing I am doing is compiling a electrical reference book which will be essential on future maintenance.

Switches

The body shell had a preformed area suitable for mounting and hiding away some of the switches that are needed. In order to plan this I created a scale diagram of the switch positions and used this as a template to cut out the required holes.

I'm not using the hazard switch provided by Chesil, instead I'm using a matching rocker switch. I have made provision for a USB output as well as the two control for the heated seats.

The picture below shows the main switches in position, the one that is missing is the Hazard swicth, which is causing me lots of grief.


Dash

I have temporary fitted the 3 main gauges and led warning lights

The steering column has been fiited, it will need a final adustment

Indicator stalk switch

Original
The replacement parts that are available are really poor in terms of finish and as this is very visible in the car I decided to do some remedial work

After a couple of hours work
I stripped the paint, then hand polished using many grades of wet and dry right down to 7000 to get the polished mirror finish. It looks much better and wil now match other parts of the internal trim.

Electric first switch on!

My plan was to fit and test all the main electrics, before fitting the additional circuits (Oil cooler, Audio, USB, Heated seats). I got there on 10th April (other than the hazard switch). here is a video of what happened.


I then checked over all the circuits and created a list of things to fix, here is the first list


Anything in red wasn't working, boxes with no colour had not been tested.

Once I tracked down each circuit, most were just a simple fix, in fact one fix cured all the lighting and fog light circuits.

One thing to watch out for, and I have now seen this on other builders blogs are the bulbs supplied with the rear indicator lights, the wattage is too low and will not trigger the flasher circuit, thsi took me a while to track down, big thank you to Steve at Chesil who had seen the problem before.

As of 22nd April the list looks like this,


Still a problem with the hazard switch, I know its the switch as if I wire in the Chesil supplied switch all works ok, something to work on.

Video overview

I have done a walk round video to give you a look at where I am at, enjoy.


PS.......Exhaust has arrived, 


More later!


Wednesday, 26 February 2020

Update end Feb 2020

February has been spent mostly on the wiring.

I finished off the fuel delivery system all the way through to the carbs.

Most of the month has been spent figuring out and connecting up the wiring harness. BIG thank you to Steve at Chesil for answering the many questions and filling in the any gaps left by the old manual which is going in the bin!


New battery tray
I decided to move the battery to the front of the car which needs the weight, this also frees up the normal battery storage for another idea I have. I installed a new battery tray and the battery fits great.


In order to move the battery to the front and keep the standard wiring loom, I installed a set of busbars and post terminals then fed a large feed cable from the front to the rear of the car.


I am not sleeving and clipping any of the wiring until I have tested everything, after which all the wiring will be tidied up. I have already added lots of shrink sleeve and overbraid to new wiring additions or where the standard loom could be improved


The following have been fitted and connected during February

  • Rear & front lights
  • Number plate light
  • Windscreen wiper mechanism
  • Washer bottle

All the wiring to the engine has been spliced into the loom, fingers crossed I have done it correctly!!!