Search This Blog

Showing posts with label 1915cc aircooled. Show all posts

Monday, 17 May 2021

Build diary Porsche 356 Speedster Chesil replica - Final post May 17th 2021

End of the build process

The car is now fully and correctly registered as a Chesil Speedster 😀

Whilst I have thoroughly enjoyed all (nearly all) the build process, it has not been without some challenges. There was no accurate build manual which really didn't help, lots of undocumented issues that are "known" to the Chesil team but not documented and the wiring loom was to be polite, lacking! Most parts don't fit out the box, thank god for my Dremel and grinding wheels and I really underestimated how much research is needed to pull the build together.

The good news for future builders is that since I started Westfield has taken over of Chesil and I'm sure given time will sort out a decent level of documentation to support the amateur builder. 

A big thank you goes out to Goose at Chesil now Westfield who was a great source of information when needed.

An update on the carbs. The lesson is buy original Weber's not Chinese copies!!!
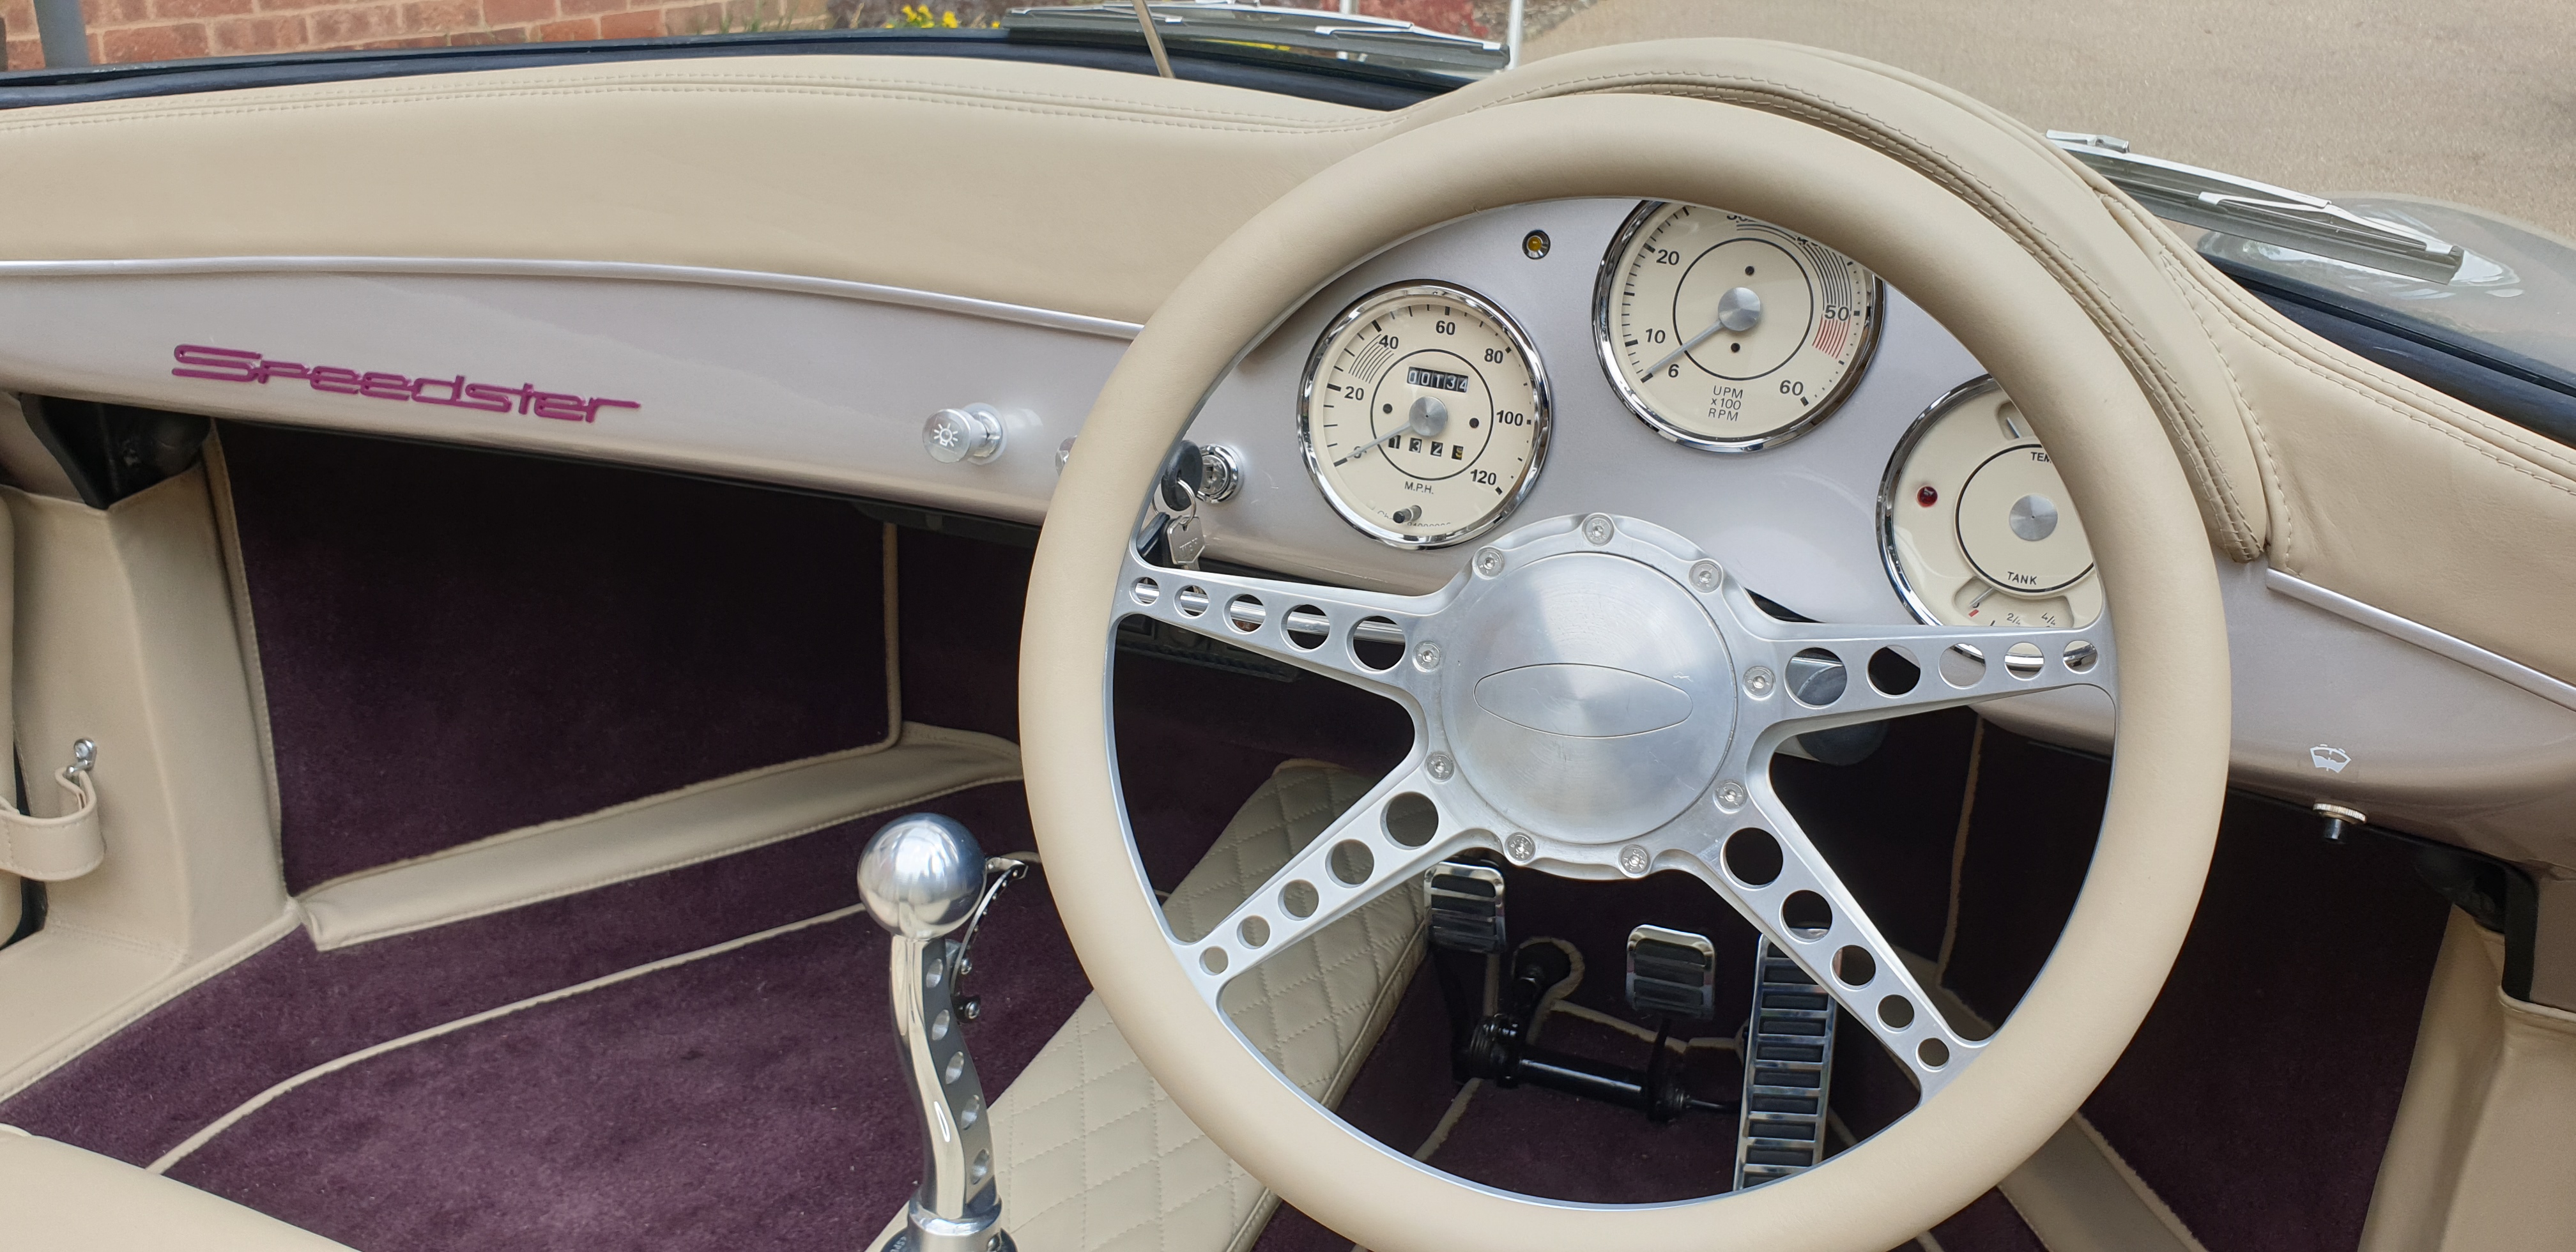
"Finished" Car


Build Photos

I have gathered together a few of my favourite pictures of the build process which I hope you enjoy.


Next Job

A bigger garage!!!


Thursday, 1 October 2020

Update Oct 1st 2020

A few final jobs before it goes back to the paint shop for a little remedial work to a few paint scratches caused build during build, I'm quite pleased that there isn't much.

From the paint shop it's up to the trimmers 1st week in November. So this is probably going to be my last update until I get the car back, hopefully in December (maybe)

Offside rear suspension

The offside rear was just not sitting at a good height, I had maxed out on the adjustment on the spring plates, but it still was not correct. I decided to bite the bullet and strip down the suspension arm, and reset back one spline on the outer torsion bar. Quite a job, but it's done and I now have a good ride height with the adjustment set the same on both sides of the car.

Other jobs

  • The front and rear sway bars have been tightened
  • Fitted the old VW steering wheel and got the horn working, this will be replaced with my custom wheel after the IVA test


  • Added Stickers relating to brake fluid


  • Finalised fit on the external oil filter and pipework.
  • Refitted final engine tinware
  • Completed a full engine run and final check on any leaks etc
Engine will need a final tune and setting up of tappets, but for now its running ok


Interior

The trimmer has provided a visual mockup of the interior, finding the colour carpet I wanted was not easy, then I found it when having a browse around John Lewis! These are just a start point, be interesting to see how it progresses once we start.

Handing over the car to someone else is scary!!! I've warned the trimmer that I am more than a little obsessed with detail,  but I'm not sure he gets how OCD I am!


Monday, 25 November 2019

Update November 2019

Painted shell

Option1 have worked on the car to bring the panel fit and shut lines up to scratch. 


Final warm silver colour applied, you need to see this in the flesh to appreciate the warm that is in the silver. Looks really good.


Body Shell refit

Body shell was lifted up and then the engine was fitted to the chassis. Once in place the body shell was very carefully lowered into place.

Engine

Specification highlights

  • Aluminium super race case, full flow oil and bored to 94mm
  • Engle 120 crank
  • EMPI GTV-2 cylinder heads with big valves
  • Pertronox Flamethrower ignition system
  • Twin 44 HMPX carbs

Colour choices

  • The tinware has been powder coated in grey/silver with metal fleck.
  • Subtle use of the purple colour
    • HT cable clips
    • Throttle swivel linkage
    • Oil filler cap
    • Gearbox cradle and strap
  • Carburettors stripped and painted black with the stacks (although hidden) coated purple

Fit

The engine has been fitted to the chassis, big milestone. No electrics or fuel connected yet. The exhaust will be custom made later in the project, fitted an old one for now


Engine Bay

I had the quilted aluminum work that is fitted in the engine bay painted to match the purple highlight colour that is being used across the whole car. The idea, was to have the light coloured tinware "pop". I think it looks good, but radical!

Also note the custom hinges, these are one off I had made.


I wanted a very clean look to the engine, part of this was to have no visible coil. The coil pack is now fitted away from the engine and invisible when looking into the engine bay from the back of the car.


Remote Oil Cooler

The engine has a full flow oil system and I needed to fit the cooler, fan and pipework, but where? There is very little space, the two options. 

Option 1, tucked under the rear wing, but it would have needed a very complex set of brackets and probably no place for the oil filter.

Option 2; Use the rear stowage area, this is fine for me as I have some ideas on what that area will look like in the finished car. I will need be to box in the fan, another job for later, but access was much easier and the pipework and oil filter will work out fine.


Friday, 25 October 2019